About a year or so ago my parents gave us a toy box. My dad had made it for my youngest sister when she was a kid and needed something to put all her toys. So it was about 12 years old or so. Since Trey was going to be needing something soon we got it.


It's hard to tell in the pics but the paint is a cream color and it was pretty dinged up, and had stains. So it needed a fresh coat of white (cream isn't my color). And the fabric on the lid was torn and a bit dated and not really my style.
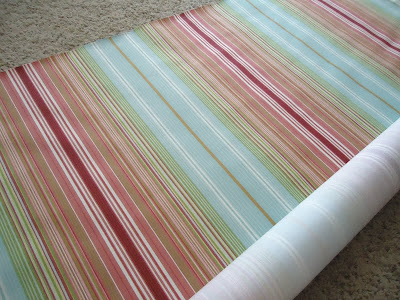
I'd found this fabric at Joane's online last month and fell in LOVE with it! I didn't know what I could use it on until I remembered that the toy box needed to be recovered. So I bought a couple of yards.
I love that it's colorful and bright and happy!
Anyway, I wasn't planning on redoing the toy box for a while but after looking at the fabric sitting there for a few weeks I had to do it, it was so pretty!
After cleaning it up I started painting the inside first. I just used the same white that I used on all my house trim, cabinets and the living room dresser.

 You can really tell it's cream once I started painting the white. I needed 2 coats of the white to get the cream good and covered. I just used a small roller and tray that I got in my free Valspar kit and an angled brush to get the corners and crevices. The white paint is also semi-gloss so that will help keep it looking good and easy to wipe off.
 I removed the lid from the box before painting it so I could get to recovering. My parents had covered the whole lid (top and bottom) and I wasn't excited about this but I couldn't think of anything better. I was planning on removing the original fabric but after realizing it couldn't be seen through the new fabric it was quicker to keep it on. And it adds another layer of cushion. I just started wrapping it like a present and tried to keep the lines as straight as possible.
Here's the after shots.


 I'm so happy with this! The crisp white was perfect with the fabric and both the fabric and white paint brighten his room up so much more! Every time I see this it makes me so happy! I love this fabric, I just want to put it all over the house! But I'll try to restrain myself! Of course as with many of my projects finishing one and seeing how great it looks usually inspires me to work on the rest of the room. I have a couple of other ideas for his room but we'll see how quickly I get to them!
This was a quick project and very easy. I started painting it out in the garage but it was too hot so I moved (ok David moved it) to the office with a drop cloth to finish painting it.
Oh I love how it looks!
Here's a final before and after.
Comments always make me Happy!


I'd found this fabric at Joane's online last month and fell in LOVE with it! I didn't know what I could use it on until I remembered that the toy box needed to be recovered. So I bought a couple of yards.

I love that it's colorful and bright and happy!
Anyway, I wasn't planning on redoing the toy box for a while but after looking at the fabric sitting there for a few weeks I had to do it, it was so pretty!
After cleaning it up I started painting the inside first. I just used the same white that I used on all my house trim, cabinets and the living room dresser.


Here's the after shots.


This was a quick project and very easy. I started painting it out in the garage but it was too hot so I moved (ok David moved it) to the office with a drop cloth to finish painting it.
Oh I love how it looks!
Here's a final before and after.
Comments always make me Happy!
No comments:
Post a Comment[Reply to comment]
Please leave a comment, I'd love to hear from you!
I will respond to questions in the comments, Thanks!