Tuesday, May 31, 2011

Smoothie Snack

You will rarely find me giving out recipes here, as I don't do the cooking in our home David does, and I don't like cooking. But I've recently been fixing myself a smoothie and I wanted to share what's in it.

It started when I went off sugar (read about that here and here) I needed to find a healthy non-sugar snack or treat when I had sweet cravings. I'd been hearing about people making green smoothies and so I decided to make my own version.

I used what I had on hand at the time which was frozen strawberries, frozen blackberries, 100% apple juice (no added sugar), and plain yogurt. I didn't measure since I was making it up as I went. I just started putting stuff in the blender till it tasted good.
All of my ingredients. I ran out of blackberries so they aren't pictured.

After a while I started adding more stuff in to make it even healthier for me.
So, here's my current version in rough estimates:
2 big spoonfuls of plain yogurt (I don't do more than that because I don't like the taste of it)
about a 1/2 cup of apple juice (you could use any juice)
tablespoon of raw honey
a few tablespoons of ground flaxseed
about 6 baby carrots
a few leaves of fresh spinach
handful of frozen blackberries
handful of frozen strawberries (without sugar added)

Here's the health benefits I'm getting from my ingredients:
I'm getting the probiotics from the yogurt
I use the juice to help make it a bit more sweet and add some moisture.
From the raw honey I'm getting a natural antidote for fighting allergies and hayfever, energy and protein. From the flaxseed I'm getting antioxidants, omega-3 and fiber.
The carrots have Vitamins A, B6, C, folic acid (to name a few).
Now the spinach is probably my favorite, it is considered a superfood (raw honey is as well). That means that it has so many vitamins and minerals in it, that they call it a superfood. Just some of what spinach contains: vitamins K, A, C, B12, B6, E magnesium, folate, manganese, iron, calcium, potassium, protein, phosphorus, zinc, omega-3 and antioxidants. We've been picking from our local farm and eating it every day. David and Trey even eat it plain, I need a bit of something with it.
From the blackberries Vitamins C, E, K, Folate, Magnesium, Potassium, Copper, Fiber, and Manganese
From strawberries Folate, Potassium, Fiber, Vitamin C and Manganese (and I love these 2 berries!)

Now I've been eating my current version for about 3-4 weeks and I love it! It makes me feel good and I know I'm putting good stuff in my body!

Comments make me Happy!


Friday, May 27, 2011

Painting More Furniture

So in my ongoing effort to lighten/brighten my living room I decided to repaint some furniture. This is something I really enjoy doing. I've been painting furniture since I was in high school. I love that you can take an old worn out piece (usually made of inferior wood) and make it into a whole new piece with some paint. And if you change your mind in a couple of years, just repaint it! It's my favorite way to freshen up a room.

First up was the tv dresser. A couple of years ago I knew we needed another solution to how our DVD's were stored and the "entertainment center" we had was cheap and falling apart. I knew that with an active baby/toddler we'd need to get the DVD's out of reach (they were in a low cabinet in the center).

I went searching Craigslist for a dresser, I wanted to put the DVD's in drawers which would be much harder for little hands to open. I found this great dresser for only $50! The lady selling it was moving and it couldn't go with them (downsizing). She was doing interior design and found it and wanted to do something cool with it but never got to it with small children in the house.
Getting it ready to paint.

It was red when we bought it and while I loved it red, David didn't care for it. So I picked a neutral color: black. I loved the way it looked! But it was time to lighten it up. So it got a fresh coat of white. It's the same white I've painted my trim in the house. That way I don't have contrasting whites!
This is the only pic I could find of it black. Looking at this pic, it was very dark and heavy.

SO much better!

Then to my steamer trunk. This was my great-aunt's trunk back around 1900's or so. My grandparents ended up with it after she and my uncle passed away. My grandpa had it painted and fixed up inside. Then a few years ago they were ready to part with it so I took it. I lived with it as it was for a few years until I was ready to repaint it. I painted it a soft teal color and didn't really care for it but it was better than before. So I lived with it for a few months.
This is how I got it from my grandparents. And yes there are butterflies and hearts painted on it...

Round 1 of painting. Not bad but it just wasn't working.

So 2 weeks ago I was ready to paint it again. I wanted to do something bold so I picked a bright green. And it was AWFUL! So, I picked another green and it was better but still not good. They were so bad that I didn't even take pics of them. At this point my desire to risk something was so out the window! It's not often I pick a wrong paint color. about 90% of the time I love the colors I pick. I was so in that 10% window. I was also tired of slapping paint on this sucker!

I talked to David about what color I needed to paint this thing and be done with it. We decided on gray. I wanted to spray paint it at this point so I went looking for gray at Lowe's and frankly their selection of gray spray paint was not good. So, I decided to go with tan. It was boring but I was done with this thing.

Finally the right color!
After spraying it, I felt much better. It actually looked much better. When David brought it back in the house, I loved it! It fit in with what I want the room to look like, light.

So there you go, my tale of 2 pieces of furniture. I have to say, I was really getting tired of heading to Lowe's a couple of times a week to get paint! And I think most of my painting adventures are over for a while.

Comments make me Happy!


Tuesday, May 24, 2011

How I Clean My Face

A couple of months ago I was reading one of my "natural" blogs and read how she used oil to clean her face. I was intrigued so I read the post. I was sold on it!
I'm not going to go into explaining why this works as I don't think I could explain adequately so here's the link to the post I read.

Here's what you do

You need Castor Oil and either Sunflower Oil or Extra Virgin Olive Oil. Oh and a small bottle to put the mixture in. I got mine at Target in their travel size section. The EVOO we buy in bulk and use in cooking so I didn't count this in the price to make this. The CO I found at my local pharmacy for $5, and the bottle cost a little over a dollar. The mixture lasted me (in my bottle) about a month.

If you read the article above she says that you really have to find your own formula and she gives a few. I have dry skin that will get oily (confusing I know but sometimes dry skin overproduces oil and you end up with oily). Anyway I first tried 25% CO and 75% EVOO. After a few weeks I was still dry so I added more EVOO. The second time I made it I put in 1 TBSP of CO and filled the bottle the rest of the way with EVOO. This combo is working much better for me.

The CO is the actual cleaning agent in this mixture and you only need a small amount because the CO will dry your skin out, which is where the EVOO comes in.

So, you have your mixture. Before bed pour some oil into your hands and start rubbing it into your face. For me this felt so weird because I'd been taught to get rid of the oil on my face so adding it felt weird for a while. After really rubbing it in, and by the way this will take off your eye make up too (not sure on waterproof mascara), take a warm to hot washcloth and hold it to your face until it cools. The article above says rinse and repeat a few times, but I get in a hurry and just do this once. I use the washcloth to wipe off the oil and BAM you are done!

Your face will feel so soft and clean! Since my face is a bit dry I put a small amount of oil back on my face to act as a moisturizer. You really just have to play with it to see what works for you.

In the morning you don't have to go through the process again. For me I get in the shower and after I get out I put a dab of oil on and it's good. No "washing" in the morning.

I've been doing this for a couple of months or so and I LOVE it! My skin looks better and feels better. It takes far less time to take care of my face in the morning and night. And it's so cheap! I don't have to buy a cleanser that was costing me $8 for a couple of months, or a moisturizer $8, or eye makeup remover $3. My bottle of CO will last me quite a while and so will the bottle. We will always have EVOO on hand.

I know this sounds a bit crazy but read the above article and give it a shot. It won't cost much to try. And you'll be working with your body on keeping a clean face not against it.

And if you do try it let me know!

Comments make me Happy!

Friday, May 20, 2011

Our Solution to Paper Clutter

Last month David and I did a lot of work on the office after getting a new desk and doing some major paper clean up. I also talked about wanting to find a way to keep the paper clutter out of the house. And so far the way we've been doing it has worked.

First here's a pic of the office now. We put up a shelf (my dad made) at the top of the wall to hold those books that David wants to read and reference. He used to have them piled on his little desk, so thought that having this shelf would free up desk space and add a bit of character to the room. I painted it the same color as the trim in the house so it would blend easily and yes it was a bit of a pain to install. David also has been going through all the piles that were just stacked up needing some attention.


After changing desks and going through a lot of papers I came across an idea from another blog and I totally stole it! I had a ton of papers to shred so I went looking at Goodwill for a shredder (I didn't want to pay $30+ for a new shredder) and we found one for $8. WOO-HOO!! Love me some Goodwill!

Next I set it up in the garage (after spending a few hours shredding what needed to be shredded....). The idea is that when David gets the mail when he comes home from work he will sort it and anything we don't need gets either shredded there in the garage or put in the paper recycling box all in the garage.

I like having a dedicated place for the shredder and that the papers usually don't make it in the house. Since our big recycling box is in the garage I just put all paper or shredded paper with it and everything is ready to go when we take the recycling.

So far it's working out great and it's been great to not have those piles on the desk! Love it!

Wednesday, May 18, 2011

WIWW #7 (1 Skirt 7 Ways)

So it's been a while since I've done What I Wore on Wednesday. Since it's warming up and I've started wearing my warm weather clothes I figured I'd post again.

I have had my eye on a certain fabric for a while and a couple of weekends ago my MIL and I went to the fabric store and looked around. I showed her the fabric and she was so sweet and bought me a yard. I was wanting to use it to make a skirt. She explained to me how I could make the skirt without buying a pattern and make my own pattern.

So I gave it a shot and it turned out great! I'm so happy with how it turned out and it only took me 2 hours to make! So, in honor of my first homemade skirt I am showing 7 different shirts/tops with the skirt. I did this so I'd know what I have in my closet that would go with it. Below are the ones I'd put with it.

Purple tank- Kohl's


Pink Tank- The Limited

White tee & blue ruffled tank- Target


Pink tank- Gap Outlet


Blue tank- Maurices


Pink Tank- Eddie Bauer Outlet


Turq Tank- Kohl's


I think my favorite is the white tee with blue tank. I think depending on if I want to be really casual or a bit dressier will determine which top. I love the brighter pink and the blue with the skirt too.


Tuesday, May 17, 2011

My Ugly Fireplace Redo

Ever since I first laid eyes on the area around my fireplace I've hated it. When we first looked at this house I thought it was awful and hoped that it could be fixed somehow. Over the years I've tackled other easier projects or more pressing ones.

I'd decorate the living room around the ugly fireplace and try to ignore it. It was this huge black hole. Our living room only has one window and it faces our neighbors house so we don't get a lot of light. I've been trying to find ways to lighten the room and it had finally come time to do something about the fireplace.

This was 3 years ago when we pulled up the badly laid tile and put in carpet. We also painted the bookcases/trim white (they were cream) The right bookcase had a magazine rack, not sure why... (we took that out).

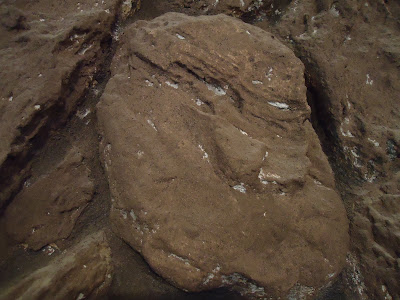
Close up of the UGLY "rock".

We thought that maybe we could try to pull it out and put up drywall in it's place. But I was afraid that it would end up being more than we could handle. Not to mention we just didn't have the money to put towards something that wasn't broke but so ugly. So I finally decided to paint it. It wasn't ideal but sometimes limited resources can force your creativity. I was hoping that by painting it a lighter color it would reflect light around the room and make it much lighter/brighter in there.

This was a few months ago. It's just a black hole.

I didn't really know what color to paint the ugly, so I talked to David about my idea and he suggested using a shade darker than the wall color. I liked that idea so I picked up the paint.

This was a very time consuming painting project. I had to work on it in shifts. I think it took about 8 hours to finish over a few days. It was more shoving paint into cracks and holes than actual painting which was easy but took a lot of time.

Stage 1, this took me about 2 hours to do....

When I start painting something that I know I can't undo I get a little panicked at first. But with this project I figured if I didn't like it it would look better than the ugly. However I LOVE it!!!

Instead of absorbing the light it's reflecting it back into the room again and it feels cleaner too! I love that paint does that! It also feels more modern which I'm starting to like the look of.

Here it is finished. And the overhead light isn't even on!

As you may have noticed I emptied out the room. I was inspired by The Nester's How to Edit a Room post to reevaluate how I wanted this room to look. It was feeling cluttered, busy, dark and not how I wanted it feel. I've been very drawn to white and lighter colors lately and wanted a more relaxed feel to the room.

So when I was ready to paint the ugly, I took all the decor and pillows out of the room, leaving only furniture, lamps and some stuff on the walls. At first it felt very empty but after a couple of days I started to like the feel. It allowed me time to figure out what I loved, liked and wanted to change. I've been thinking about what I have that I want to put back in the room and what can stay out. Also if I want to repaint something or if I want some new items.

I've really enjoyed clearing out the room, I don't think I would have made the same decisions had I left everything in the room. I'll share more about that soon. I challenge you that if you don't like the feeling of a room to clear it out and see how you feel about it. Also read the above mentioned post for more inspiration. It's a fun process!

Body Butter Review

About a month ago I talked about adoption and body butter. Well, I've been using it for a while now and I wanted to share what I thought of it.


Once I was notified of shipping it was to me super fast. The body butter flavor I requested is Sweet Orange and it's in a nice plastic tub, which I wasn't expecting (not sure why, but I wasn't). Kiara was kind enough to send me 2 chapsticks as well, one in Sweet Orange and the other Peppermint.

When I received the package the body butter was liquid (I think the chapsticks were too but I didn't check). BUT, it was a hot day and it sat in the mailbox for a while. Secondly I had remembered that I'd read that coconut oil turns to liquid at around 76 degrees. And all these products are made with coconut oil.

After opening the package and checking it out (I was excited), I stuck everything in the fridge for a couple of hours and it firmed back up. When I got them back out of the fridge and used them it actually felt really nice because like I said it was a warm day (90's).

It doesn't take much, a little goes a long way. It has a bit of a greasy (for lack of a better word) feel to it at first but after your body absorbs it in you aren't greasy. I think this comes from the coconut oil. It does moisturize very well and I really like it.

The chapstick I was very happy about because I'd just bought a store brand natural chapstick (which I like) but I knew these were more natural. They moisturize very well and smell nice too. You just have to be careful about putting these in your pocket when it's warm because they will start to melt (over 76 degrees).

All in all I'm very pleased with the products and would get them again. The only thing is that I didn't think that the body butter or the one chapstick smelled like Sweet Orange, I think they smell like chocolate bunny's! But the peppermint chapstick does smell like peppermint. But I still love them!

If you are considering a more natural chapstick or body lotion/cream go check out Kiara's blog. You would be supporting handmade, natural products and adoption all in one. And you can't beat her prices!

Friday, May 6, 2011

Natural Cycle Products

WARNING if you are male you may not want to read this.

A few weeks ago I decided to make the switch from paper menstrual cycle products to cloth and other alternatives. This week I started using them. While I've only tested them for a little bit I still want to share what I think about them and what they are.

Mama Cloth (cloth pads)

For some reason I never made the connection between cloth diapers and mama cloth. I use cloth on Trey for a variety of reasons but one being that I didn't want the chemicals in the disposables on his little privates. Well, in my reading I read that there are chemicals in disposable pads and tampons and that we are putting that on or in our bodies. That was a good enough reason to switch for me!

I did some research and found that you could buy mama cloth online. Some cloth diaper companies also make mama cloth. I also found several blogs out there that give tutorials on how to make your own. I also found out that my local cloth diaper store carried mama cloth.

Here's what I'm doing

I bought 3 mama cloth pads from my local diaper store and I also made some (thinner ones for thongs, sorry TMI but just trying to be clear what I'm doing). I also bought a small wet/dry bag at the diaper store. I'm able to put all my cloth in the bag and it's cute enough it looks like a makeup bag, so I can throw it in my purse and no one knows what it is.

Diva Cup

I heard about this on another blog and the woman loved it. I usually use tampons so I liked the idea of using this. It's a small cup that is inserted and will collect fluids. It's better than a tampon as it doesn't cause TSS like tampons. It also doesn't absorb fluids but collects them. And the reason I love it compared to tampons is that it can stay in for up to 12 hours and you don't have to remove or replace it like tampons to use the bathroom. When it gets full or you want to remove it, you just dump in the toilet and rise it out and reinsert it.

I love this thing! Once in and in place I couldn't feel it. I liked not having to worry about checking or changing things throughout the day. I just checked it in the morning and before bed. I had some minor leaks but I think that was due to not getting it in place more than faulty product. The leaks were only one day. The cup is supposed to last for at least a year if not more depending on each woman.

Info

If you are interested in this here's where I got them and how I made them.

If you are in the OKC metro area, I bought my mama cloth and wet/dry bag at The Green Bambino The ladies there are super helpful and use mama cloth as well.

I bought the Diva cup on Amazon but here a link to their site where you can get more info and buy it as well.

If you want to make your own mama cloth this is what I did. I took a disposable and traced the shape on the fabric. This was the easiest way for me to get the size and shape I wanted. After making one I altered it a bit till I had what I wanted. For fabric I used terrycloth for the absorbent layer and some cotton flannel for the outer layers. I've read many combinations of what you should use, but this is what I found at the fabric store and so far it's working for me. I've heard of women using old towels and flannel shirts cut and sewn to make the pad. Right now I'm using a safety pin to hold the wings and keep the pad in place since there isn't any adhesive. Snaps are recommended and again if you are OKC local the Green Bambino can put snaps on for a small fee, or do them yourself (I don't know how to do that yet). Here's a link to a tutorial that I followed to make mine. Oh and you can get pretty fabric if you want to make it just a bit more pleasant!

All in all I'm very happy with my changes. I did spend more money upfront (just like cloth diapers) but the cloth will last a long time, many years and the cup hopefully a couple. They are all very comfortable, much more so than their disposable counterparts. They will save me money in the long run and I don't need very much to take care of my needs. At the end of my week I just throw the pads in the wash or put them in with the diapers. The cup is washed out with mild soap and stored for next month.

You really have to know your cycle to be able to buy accordingly. I think the first month is a bit of a learning curve but I'm very pleased with everything.

Wednesday, May 4, 2011

Buffalo Meat, Raw Milk and a Movie

When David and I got married we each brought a couple of recipes with us. We had both been brought up on comfort food, although David much more so than I. He grew up with more traditional southern comfort food and I maybe more simple comfort food.


So after a few years we got bored with our recipes and started looking or being open to new things. A few more years and David began watching some cooking shows and found out he loved to cook.

I think it was about this time that we really started to enjoy food more and started trying more recipes. Since he was enjoying the process of cooking he was cooking a lot of meals if not most from scratch.

We had never been big on things like Hamburger Helper or frozen meals. But we hadn't been using a lot of fresh ingredients.

Then a few months ago I began reading a lot of what I call natural blogs. Blogs that were focused on healthy foods and healthy living. There was lots of talk on gardening, whole foods, farmers markets, raw milk and pesticide-free.

It was getting me excited about finding foods for our family that was truly healthy for us. I started a garden, cut foods out that had high fructose corn syrup, and bought healthy snacks.

My mom and I have talked about this stuff a lot lately and are making the same changes . After a conversation about healthy meat she went to the farmers market and bought a buffalo roast.

It was pretty good. It tasted a lot like beef and with a little salt and pepper I really didn't notice a difference. It's much leaner than beef (so you have to cook it slower so it won't get tough). Buffalo meat is healthier than beef because it doesn't have a lot of fat in it.

We had also talked for a few weeks about raw milk. I was very interested in trying some but you can't exactly pick it up at the grocery store. Thankfully I had a friend who is a dairy farmer and she hooked me up (thanks Paige!)

Yesterday my mom and I each bought a gallon to try. I was afraid it would taste really different from what I was used to and then I wouldn't like it. But, the taste is really the same with a bit more sweet (not much) and creamier. And oh yeah, no hormones in it! Just knowing it's better for us makes me like it more!

Realizing there were hormones in my milk really bothered me (as it should). I didn't want strange hormones in my body (or my family's bodies), who knows what it's doing to me. I started wondering if it could be one cause of our infertility.

Last night we checked out a local farmer not a mile from our house. We didn't know she was there until a couple of months ago. We were after some spinach and eggs and we weren't disappointed! She was extremely nice and welcoming (so much that Trey wanted to hang out with her, he's usually very shy with new people).

She showed us around, told us we were now family and to come to the back door next time, and explained how she did things including that she didn't use pesticides or other junk. Her food was all natural. We picked a ton of spinach, which was snacked on in the car. Trey loves spinach and David loved how the fresh spinach tasted. This is big for a recovering comfort food guy!

David and I watched a documentary on Netflix the other night called FoodMatters. If you haven't watched it go watch it! The main theme of the movie was "we are what we eat". They covered a lot on how important it is to get the vitamins our bodies need and how it fails (getting sick) when it doesn't get them. I'll try to share about this movie some more another time.

So I'm pretty excited right now about finding the best food we can. I'm going to be doing some research on vitamins and which vitamin does what and I'll share what I find. The movie also talked about super foods and I'm going to be doing more research on that as well.

I'm excited about the new things I'm learning and look forward to sharing what I learn!


Related Posts Plugin for WordPress, Blogger...