Friday, June 3, 2011

Project Time!

Here's a little project that I totally borrowed from the Nester. She made these way cool looking little canvas's using old maps. I loved it so much I even pinned it on my Pinterest so I could reference it again.

So as I was going through all the stuff in the living room to see what to keep and what to move out I was looking through this book from the National Geographic Society: Isles of the Caribbean. I bought it a couple of years ago from a library sale for $1. I love beaches so I got it. It was put out in the early 80's so the pics aren't the best.

I was flipping through it and came across a 2 page spread photo that I loved! It had gorgeous colors and no people in it. And I thought it would be perfect for this little project.

I used an exacto knife to cut the pages out of the book. Then measured it to see what size canvases I needed. I used 2 5x7 canvases. Sorry I was a bad blogger and didn't take pics of the process.

The Nester describes in better detail how to attach the picture/photo/map to your canvas. I did the whole use what you have thing. So I used Modge Podge instead of the adhesive she used. If you are going to do this project I recommend either using the adhesive she used or if using Modge Podge put a coat on both the canvas and the print. I only put a coat on the canvas and it bubbled up after drying.

If you look real close you can see bubbles but since the canvases are small you can't tell unless you are looking really close. Anyway, just wrap your canvas like a present and let it dry. It didn't take long at all for mine to dry.

I LOVE them! I love everything about them! The colors especially! Now I want to go scour more books for great looking photos!

Comments make me Happy!

Tuesday, May 31, 2011

Smoothie Snack

You will rarely find me giving out recipes here, as I don't do the cooking in our home David does, and I don't like cooking. But I've recently been fixing myself a smoothie and I wanted to share what's in it.

It started when I went off sugar (read about that here and here) I needed to find a healthy non-sugar snack or treat when I had sweet cravings. I'd been hearing about people making green smoothies and so I decided to make my own version.

I used what I had on hand at the time which was frozen strawberries, frozen blackberries, 100% apple juice (no added sugar), and plain yogurt. I didn't measure since I was making it up as I went. I just started putting stuff in the blender till it tasted good.
All of my ingredients. I ran out of blackberries so they aren't pictured.

After a while I started adding more stuff in to make it even healthier for me.
So, here's my current version in rough estimates:
2 big spoonfuls of plain yogurt (I don't do more than that because I don't like the taste of it)
about a 1/2 cup of apple juice (you could use any juice)
tablespoon of raw honey
a few tablespoons of ground flaxseed
about 6 baby carrots
a few leaves of fresh spinach
handful of frozen blackberries
handful of frozen strawberries (without sugar added)

Here's the health benefits I'm getting from my ingredients:
I'm getting the probiotics from the yogurt
I use the juice to help make it a bit more sweet and add some moisture.
From the raw honey I'm getting a natural antidote for fighting allergies and hayfever, energy and protein. From the flaxseed I'm getting antioxidants, omega-3 and fiber.
The carrots have Vitamins A, B6, C, folic acid (to name a few).
Now the spinach is probably my favorite, it is considered a superfood (raw honey is as well). That means that it has so many vitamins and minerals in it, that they call it a superfood. Just some of what spinach contains: vitamins K, A, C, B12, B6, E magnesium, folate, manganese, iron, calcium, potassium, protein, phosphorus, zinc, omega-3 and antioxidants. We've been picking from our local farm and eating it every day. David and Trey even eat it plain, I need a bit of something with it.
From the blackberries Vitamins C, E, K, Folate, Magnesium, Potassium, Copper, Fiber, and Manganese
From strawberries Folate, Potassium, Fiber, Vitamin C and Manganese (and I love these 2 berries!)

Now I've been eating my current version for about 3-4 weeks and I love it! It makes me feel good and I know I'm putting good stuff in my body!

Comments make me Happy!


Friday, May 27, 2011

Painting More Furniture

So in my ongoing effort to lighten/brighten my living room I decided to repaint some furniture. This is something I really enjoy doing. I've been painting furniture since I was in high school. I love that you can take an old worn out piece (usually made of inferior wood) and make it into a whole new piece with some paint. And if you change your mind in a couple of years, just repaint it! It's my favorite way to freshen up a room.

First up was the tv dresser. A couple of years ago I knew we needed another solution to how our DVD's were stored and the "entertainment center" we had was cheap and falling apart. I knew that with an active baby/toddler we'd need to get the DVD's out of reach (they were in a low cabinet in the center).

I went searching Craigslist for a dresser, I wanted to put the DVD's in drawers which would be much harder for little hands to open. I found this great dresser for only $50! The lady selling it was moving and it couldn't go with them (downsizing). She was doing interior design and found it and wanted to do something cool with it but never got to it with small children in the house.
Getting it ready to paint.

It was red when we bought it and while I loved it red, David didn't care for it. So I picked a neutral color: black. I loved the way it looked! But it was time to lighten it up. So it got a fresh coat of white. It's the same white I've painted my trim in the house. That way I don't have contrasting whites!
This is the only pic I could find of it black. Looking at this pic, it was very dark and heavy.

SO much better!

Then to my steamer trunk. This was my great-aunt's trunk back around 1900's or so. My grandparents ended up with it after she and my uncle passed away. My grandpa had it painted and fixed up inside. Then a few years ago they were ready to part with it so I took it. I lived with it as it was for a few years until I was ready to repaint it. I painted it a soft teal color and didn't really care for it but it was better than before. So I lived with it for a few months.
This is how I got it from my grandparents. And yes there are butterflies and hearts painted on it...

Round 1 of painting. Not bad but it just wasn't working.

So 2 weeks ago I was ready to paint it again. I wanted to do something bold so I picked a bright green. And it was AWFUL! So, I picked another green and it was better but still not good. They were so bad that I didn't even take pics of them. At this point my desire to risk something was so out the window! It's not often I pick a wrong paint color. about 90% of the time I love the colors I pick. I was so in that 10% window. I was also tired of slapping paint on this sucker!

I talked to David about what color I needed to paint this thing and be done with it. We decided on gray. I wanted to spray paint it at this point so I went looking for gray at Lowe's and frankly their selection of gray spray paint was not good. So, I decided to go with tan. It was boring but I was done with this thing.

Finally the right color!
After spraying it, I felt much better. It actually looked much better. When David brought it back in the house, I loved it! It fit in with what I want the room to look like, light.

So there you go, my tale of 2 pieces of furniture. I have to say, I was really getting tired of heading to Lowe's a couple of times a week to get paint! And I think most of my painting adventures are over for a while.

Comments make me Happy!


Tuesday, May 24, 2011

How I Clean My Face

A couple of months ago I was reading one of my "natural" blogs and read how she used oil to clean her face. I was intrigued so I read the post. I was sold on it!
I'm not going to go into explaining why this works as I don't think I could explain adequately so here's the link to the post I read.

Here's what you do

You need Castor Oil and either Sunflower Oil or Extra Virgin Olive Oil. Oh and a small bottle to put the mixture in. I got mine at Target in their travel size section. The EVOO we buy in bulk and use in cooking so I didn't count this in the price to make this. The CO I found at my local pharmacy for $5, and the bottle cost a little over a dollar. The mixture lasted me (in my bottle) about a month.

If you read the article above she says that you really have to find your own formula and she gives a few. I have dry skin that will get oily (confusing I know but sometimes dry skin overproduces oil and you end up with oily). Anyway I first tried 25% CO and 75% EVOO. After a few weeks I was still dry so I added more EVOO. The second time I made it I put in 1 TBSP of CO and filled the bottle the rest of the way with EVOO. This combo is working much better for me.

The CO is the actual cleaning agent in this mixture and you only need a small amount because the CO will dry your skin out, which is where the EVOO comes in.

So, you have your mixture. Before bed pour some oil into your hands and start rubbing it into your face. For me this felt so weird because I'd been taught to get rid of the oil on my face so adding it felt weird for a while. After really rubbing it in, and by the way this will take off your eye make up too (not sure on waterproof mascara), take a warm to hot washcloth and hold it to your face until it cools. The article above says rinse and repeat a few times, but I get in a hurry and just do this once. I use the washcloth to wipe off the oil and BAM you are done!

Your face will feel so soft and clean! Since my face is a bit dry I put a small amount of oil back on my face to act as a moisturizer. You really just have to play with it to see what works for you.

In the morning you don't have to go through the process again. For me I get in the shower and after I get out I put a dab of oil on and it's good. No "washing" in the morning.

I've been doing this for a couple of months or so and I LOVE it! My skin looks better and feels better. It takes far less time to take care of my face in the morning and night. And it's so cheap! I don't have to buy a cleanser that was costing me $8 for a couple of months, or a moisturizer $8, or eye makeup remover $3. My bottle of CO will last me quite a while and so will the bottle. We will always have EVOO on hand.

I know this sounds a bit crazy but read the above article and give it a shot. It won't cost much to try. And you'll be working with your body on keeping a clean face not against it.

And if you do try it let me know!

Comments make me Happy!

Friday, May 20, 2011

Our Solution to Paper Clutter

Last month David and I did a lot of work on the office after getting a new desk and doing some major paper clean up. I also talked about wanting to find a way to keep the paper clutter out of the house. And so far the way we've been doing it has worked.

First here's a pic of the office now. We put up a shelf (my dad made) at the top of the wall to hold those books that David wants to read and reference. He used to have them piled on his little desk, so thought that having this shelf would free up desk space and add a bit of character to the room. I painted it the same color as the trim in the house so it would blend easily and yes it was a bit of a pain to install. David also has been going through all the piles that were just stacked up needing some attention.


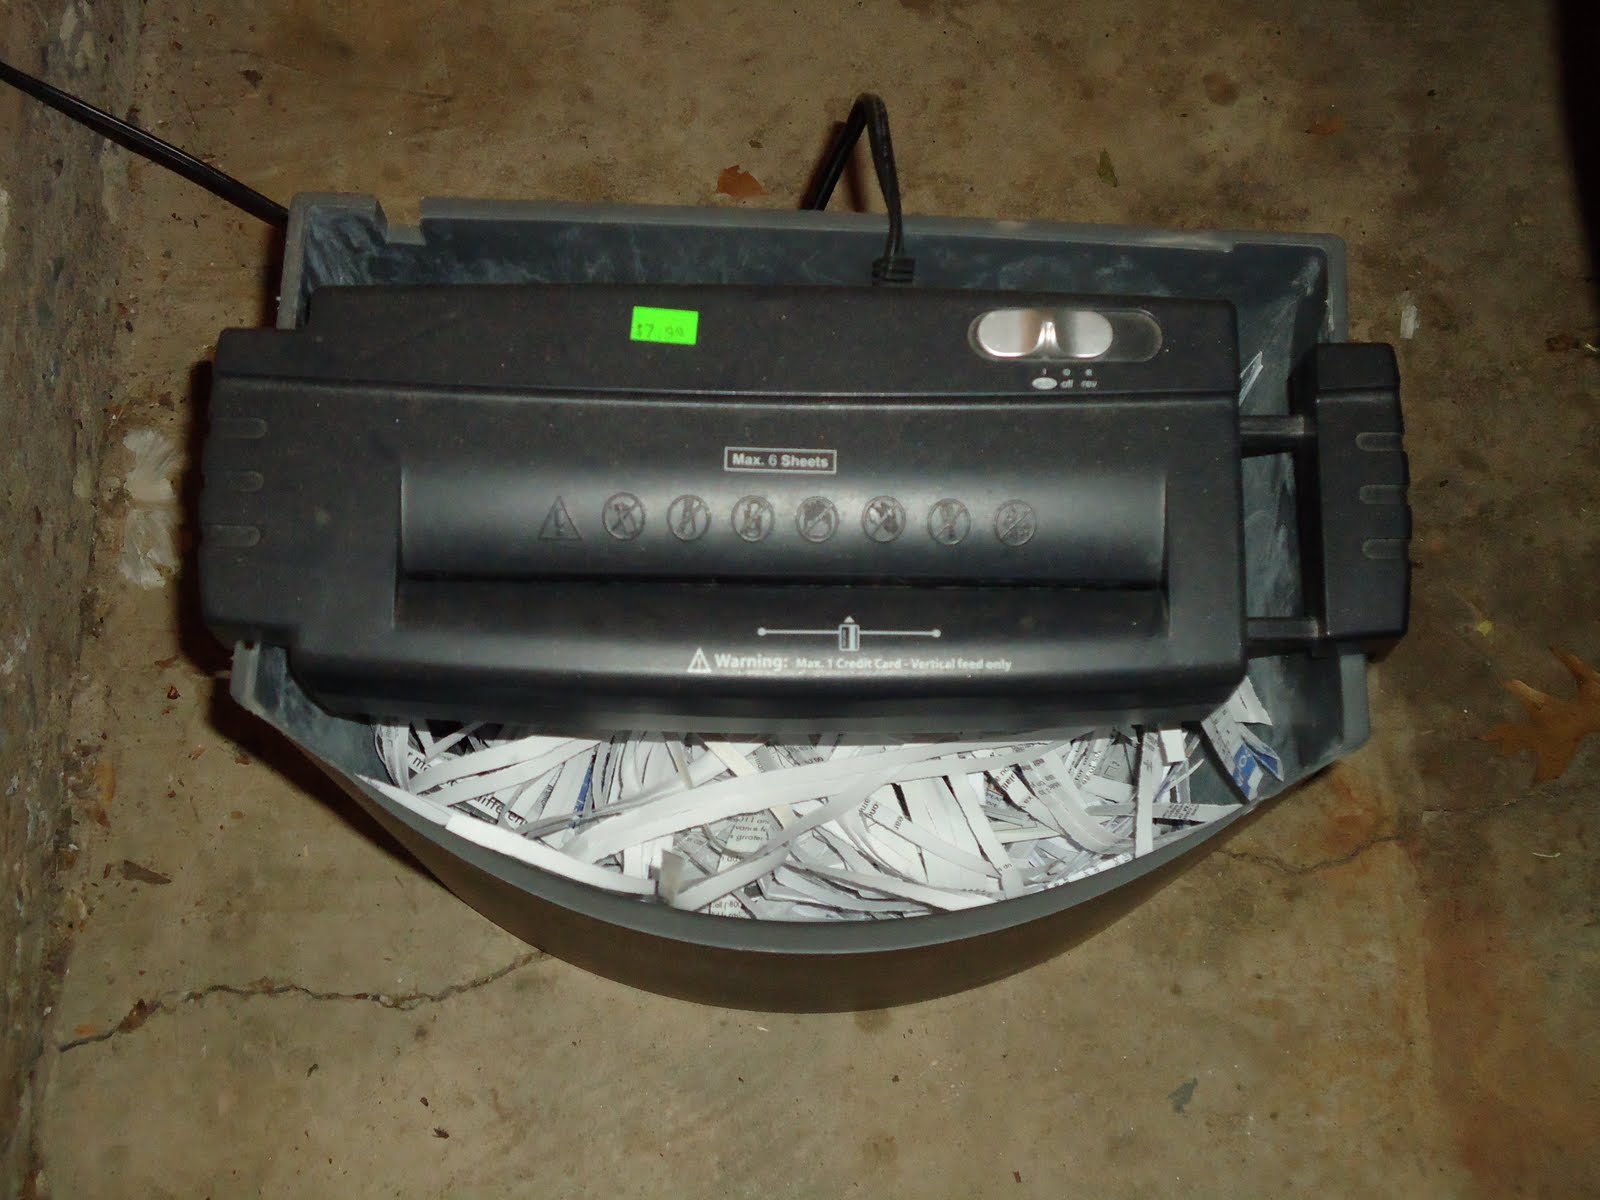
After changing desks and going through a lot of papers I came across an idea from another blog and I totally stole it! I had a ton of papers to shred so I went looking at Goodwill for a shredder (I didn't want to pay $30+ for a new shredder) and we found one for $8. WOO-HOO!! Love me some Goodwill!

Next I set it up in the garage (after spending a few hours shredding what needed to be shredded....). The idea is that when David gets the mail when he comes home from work he will sort it and anything we don't need gets either shredded there in the garage or put in the paper recycling box all in the garage.

I like having a dedicated place for the shredder and that the papers usually don't make it in the house. Since our big recycling box is in the garage I just put all paper or shredded paper with it and everything is ready to go when we take the recycling.

So far it's working out great and it's been great to not have those piles on the desk! Love it!

Wednesday, May 18, 2011

WIWW #7 (1 Skirt 7 Ways)

So it's been a while since I've done What I Wore on Wednesday. Since it's warming up and I've started wearing my warm weather clothes I figured I'd post again.

I have had my eye on a certain fabric for a while and a couple of weekends ago my MIL and I went to the fabric store and looked around. I showed her the fabric and she was so sweet and bought me a yard. I was wanting to use it to make a skirt. She explained to me how I could make the skirt without buying a pattern and make my own pattern.

So I gave it a shot and it turned out great! I'm so happy with how it turned out and it only took me 2 hours to make! So, in honor of my first homemade skirt I am showing 7 different shirts/tops with the skirt. I did this so I'd know what I have in my closet that would go with it. Below are the ones I'd put with it.

Purple tank- Kohl's


Pink Tank- The Limited

White tee & blue ruffled tank- Target


Pink tank- Gap Outlet


Blue tank- Maurices


Pink Tank- Eddie Bauer Outlet


Turq Tank- Kohl's


I think my favorite is the white tee with blue tank. I think depending on if I want to be really casual or a bit dressier will determine which top. I love the brighter pink and the blue with the skirt too.


Tuesday, May 17, 2011

My Ugly Fireplace Redo

Ever since I first laid eyes on the area around my fireplace I've hated it. When we first looked at this house I thought it was awful and hoped that it could be fixed somehow. Over the years I've tackled other easier projects or more pressing ones.

I'd decorate the living room around the ugly fireplace and try to ignore it. It was this huge black hole. Our living room only has one window and it faces our neighbors house so we don't get a lot of light. I've been trying to find ways to lighten the room and it had finally come time to do something about the fireplace.

This was 3 years ago when we pulled up the badly laid tile and put in carpet. We also painted the bookcases/trim white (they were cream) The right bookcase had a magazine rack, not sure why... (we took that out).

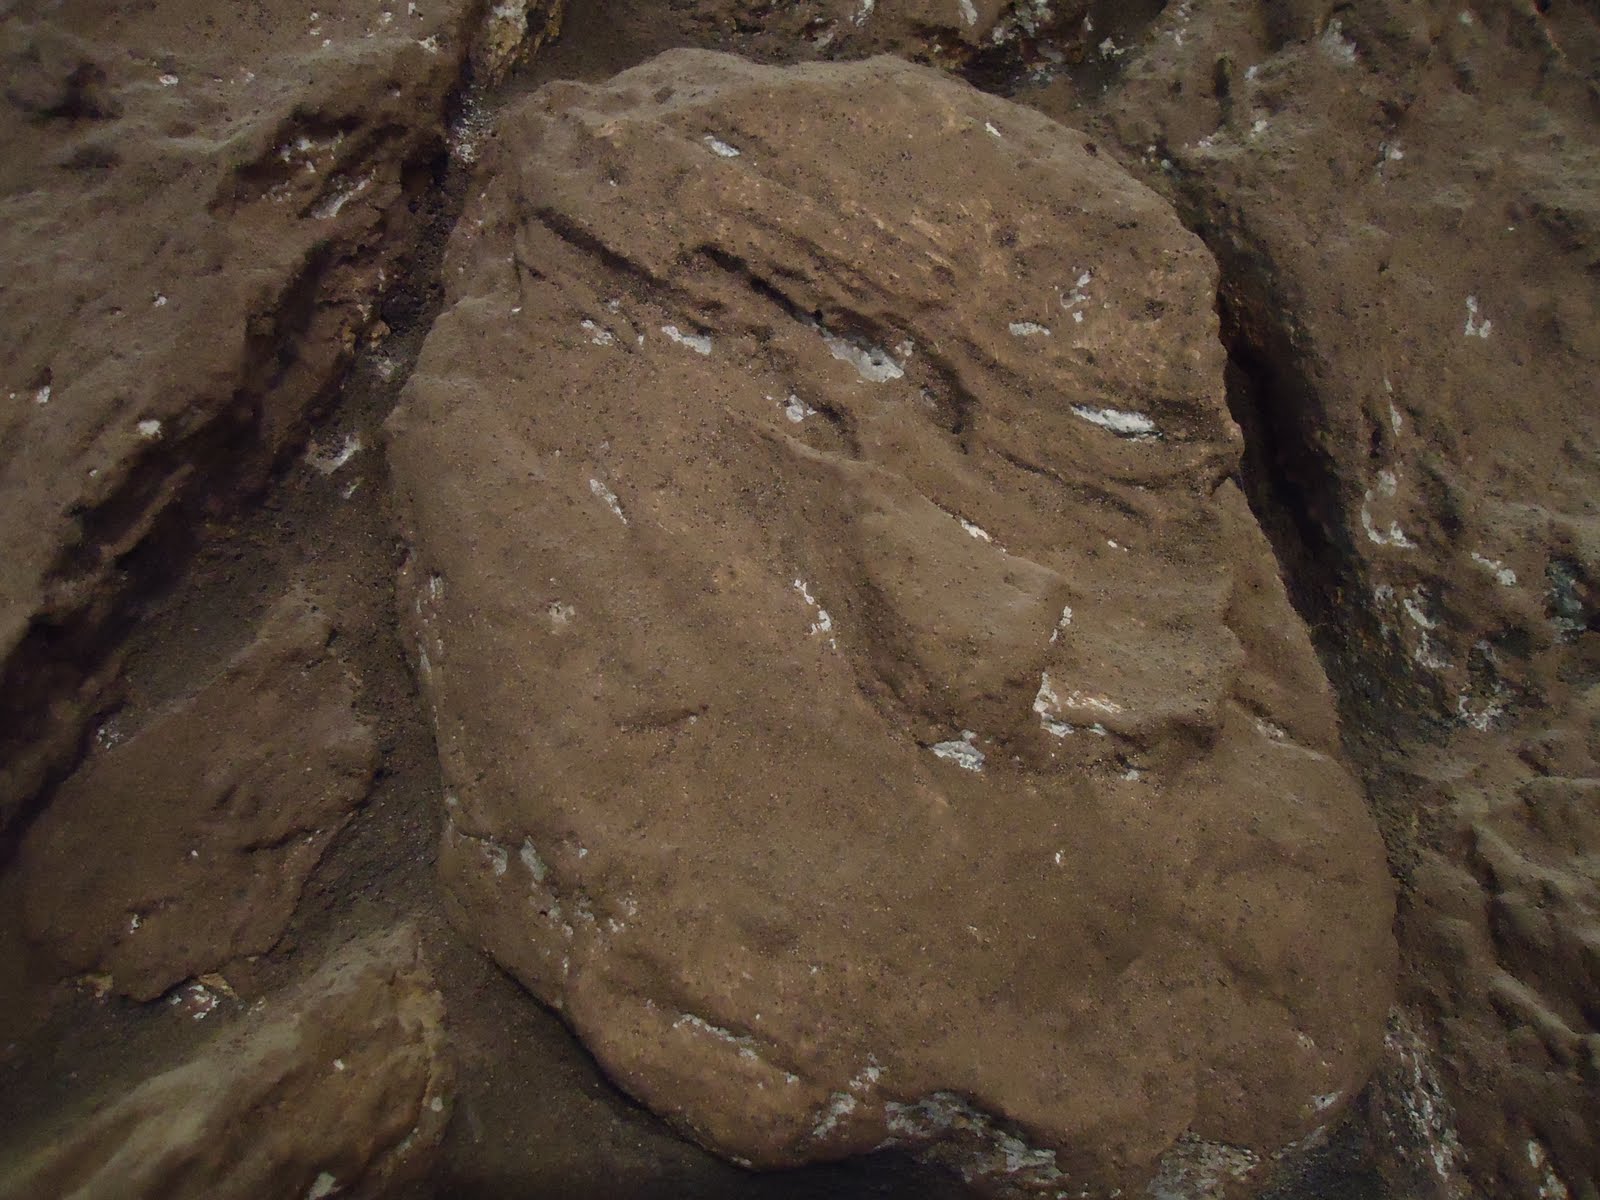
Close up of the UGLY "rock".

We thought that maybe we could try to pull it out and put up drywall in it's place. But I was afraid that it would end up being more than we could handle. Not to mention we just didn't have the money to put towards something that wasn't broke but so ugly. So I finally decided to paint it. It wasn't ideal but sometimes limited resources can force your creativity. I was hoping that by painting it a lighter color it would reflect light around the room and make it much lighter/brighter in there.

This was a few months ago. It's just a black hole.

I didn't really know what color to paint the ugly, so I talked to David about my idea and he suggested using a shade darker than the wall color. I liked that idea so I picked up the paint.

This was a very time consuming painting project. I had to work on it in shifts. I think it took about 8 hours to finish over a few days. It was more shoving paint into cracks and holes than actual painting which was easy but took a lot of time.

Stage 1, this took me about 2 hours to do....

When I start painting something that I know I can't undo I get a little panicked at first. But with this project I figured if I didn't like it it would look better than the ugly. However I LOVE it!!!

Instead of absorbing the light it's reflecting it back into the room again and it feels cleaner too! I love that paint does that! It also feels more modern which I'm starting to like the look of.

Here it is finished. And the overhead light isn't even on!

As you may have noticed I emptied out the room. I was inspired by The Nester's How to Edit a Room post to reevaluate how I wanted this room to look. It was feeling cluttered, busy, dark and not how I wanted it feel. I've been very drawn to white and lighter colors lately and wanted a more relaxed feel to the room.

So when I was ready to paint the ugly, I took all the decor and pillows out of the room, leaving only furniture, lamps and some stuff on the walls. At first it felt very empty but after a couple of days I started to like the feel. It allowed me time to figure out what I loved, liked and wanted to change. I've been thinking about what I have that I want to put back in the room and what can stay out. Also if I want to repaint something or if I want some new items.

I've really enjoyed clearing out the room, I don't think I would have made the same decisions had I left everything in the room. I'll share more about that soon. I challenge you that if you don't like the feeling of a room to clear it out and see how you feel about it. Also read the above mentioned post for more inspiration. It's a fun process!
Related Posts Plugin for WordPress, Blogger...